hexo博客next8.21.0主题美化优化教程

为了描述方便,_config.yml称为 站点配置文件,_config.next.yml 称为 主题配置文件。

下载 next 主题文件

  • Hexo-Next 主题博客个性化配置超详细,超全面(两万字)_hexo next 记录访问了ip-CSDN博客

  • next主题项目:next-theme/hexo-theme-next: 🎉 Elegant and powerful theme for Hexo. (github.com)

  • D:\Hexo-Blog\blog-demo文件夹下打开Open Git Bash here,输入以下命令:下载next源码

    git clone https://github.com/next-theme/hexo-theme-next themes/next
    Administrator@DESKTOP-O7B3NJL MINGW64 /d/hexo-next8.23/blog-demo
    $ git clone https://github.com/next-theme/hexo-theme-next themes/next
    Cloning into 'themes/next'...
    remote: Enumerating objects: 7576, done.
    remote: Counting objects: 100% (994/994), done.
    remote: Compressing objects: 100% (177/177), done.
    remote: Total 7576 (delta 875), reused 820 (delta 817), pack-reused 6582 (from 3
    )
    Receiving objects: 100% (7576/7576), 1.60 MiB | 2.20 MiB/s, done.
    Resolving deltas: 100% (4819/4819), done.
  • 手动将 D:\Hexo-Blog\blog-demo\themes\next 复制到博客根目录下 D:\Hexo-Blog\blog-demo 并重命名为**_config.next.yml** 即可。以后如果修改任何主题配置,都只需修改**_config.next.yml**的配置即可。

  • 如果是第一次安装使用hexo以及next主题,还需要安装pug以及stylus的渲染器。也可以检查路径hexo-next8.23\blog-demo\node_modules下是否存在hexo-renderer-stylus和hexo-renderer-pug文件夹,如果没有,就是没有安装上面的渲染器,需要安装。安装完成后会在上面的文件夹生成2个文件hexo-renderer-stylus和hexo-renderer-pug
    npm install hexo-renderer-pug hexo-renderer-stylus --save

    Administrator@DESKTOP-O7B3NJL MINGW64 /d/hexo-next8.23/blog-demo
    $ npm install hexo-renderer-pug hexo-renderer-stylus --save

    added 34 packages in 5s
    40 packages are looking for funding
    run `npm fund` for details
  • 推送到github

    D:\Hexo-Blog\blog-demo 下的 Git BASH终端 hexo clean && hexo generate && hexo deploy
    vscode终端下用命令: hexo cl; hexo g; hexo d

卸载自带的 landscape 主题

上面安装好next主题后,hexo自带的主题hexo-theme-landscape就可以卸载了。
npm uni hexo-theme-landscape --save

Administrator@DESKTOP-O7B3NJL MINGW64 /d/hexo-next8.23/blog-demo 执行结果
$ npm uni hexo-theme-landscape --save

removed 1 package in 1s
41 packages are looking for funding
run `npm fund` for details

然后在hexo-next8.23\blog-demo\node_modules文件夹下看是否还有hexo-theme-landscape文件夹存在。

修改语言网站标题等

打开站点配置文件,搜索 language,找到如下代码:

# Site 网站标题 设置
title: 浩跃霖希的博客 # 网站标题
subtitle: 代码爱好者的坚持 # 网站副标题
description: 学而不思则罔,思而不学则殆! # 网站描述
keywords: # 网站的关键词。 支持多个关键词
author: 浩跃霖希 # 您的名字
language: zh-CN # 指定语言,会影响主题显示的语言,按需修改
timezone: Asia/Shanghai # 网站时区。 Hexo 默认使用您电脑的时区

切换主题

next 主题自带四种样式。在主题配置文件中查找:scheme找到如下代码:想要那个样式,去掉前面的#即可。

# Schemes
#scheme: Muse
#scheme: Mist
#scheme: Pisces
scheme: Gemini

在侧边栏网站名称下显示图片

自行放置一张想要显示的图片到blog-demo\themes\next\source\images路径下,修改主题配置代码custom_logo:的值为:/images/绝世九小姐.jpg

新建标签及分类界面等菜单键页面

打开 主题配置文件,搜索 menu,找到如下代码:进行修改。

menu:
home: / || fa fa-home
about: /about/ || fa fa-user # 关于页
tags: /tags/ || fa fa-tags # 标签页
categories: /categories/ || fa fa-th # 分类页
archives: /archives/ || fa fa-archive # 归档页
#schedule: /schedule/ || fa fa-calendar # 日程表页
guestbook: /guestbook/ || fa fa-book # 留言板 页
#sitemap: /sitemap.xml || fa fa-sitemap # 站点地图
urlmark: /urlmark || fas fa-link # 网址收藏页fa fa-inbox
#commonweal: /404/ || fa fa-heartbeat
  • urlmark 代表网页侧边栏中的菜单名称,英文翻译成中文的话修改blog-demo\themes\next\languages路径下的zh-CN.yml文件,打开文件找到menu:在其下最后添加urlmark: 网址收藏,你想翻译成哪个中文都可以的。

  • 修改为中文的第二种方法。网上大多数的教程都是建议直接修改该文件,但是和前面提到的页面定制相似,我们并不希望直接修改主题目录中的国际化配置文件。注意到同级目录中有一个 theme/next/languages/README.md 文件,里面提供了官方建议的无侵入式地覆盖默认翻译的方法:
    在 Hexo 博客项目的`` blog-demo\source路径下创建_data文件夹,在_data文件夹下创建一个 languages.yml `文件。添加如下配置覆盖默认翻译:

    # language
    zh-CN:
    # items
    menu:
    # the translation you perfer
    links: 友链
    guestbook: 留言板
    Bookmarking: 网址收藏
    Friend link: 友情链接
  • /urlmark表示的是要打开的文件的路径,默认是打开其下的index.md文件。

  • || 这后面跟的是网页菜单项前显示的图标图标网站2

  • hexo new page about为新建关于页,会在blog-demo\source文件夹下生成一个about文件夹,里面生成一个index.md文件,在短—`下编写关于你网站的信息即可,样式如式:

---
title: 关于
type: about
---
  • hexo new page tag为新建标签页,会在blog-demo\source文件夹下生成一个tag文件夹,里面生成一个index.md文件,在短---下编写关于你网站的信息即可,title标签type标签,即可。
  • 如果还要生成其它的页面,按以上格式生成修改即可。

侧边栏设置

设置头像:

设置头像圆形,停留旋转效果,修改主题配置如下:

#侧边栏头像
avatar:
#替换默认图像并在此处设置url。
url: /images/弟子规.jpg #/images/avatar.gif
#如果为真,化身将以圆圈显示。
rounded: true
#如果为真,化身将随光标旋转。
rotated: true

侧边栏上显示相关文章:

在主题配置文件中搜索related_postsenable: true开启相关文章推荐功能。

添加社交链接:

修改主题配置如下:

#社交链接,用法:`关键字:固定链接||图标`
social:
GitHub: https://github.com/jinwei26 || fab fa-github
E-Mail: mailto:[email protected] || fa fa-envelope
netlify-blog: https://blognet.bere.top || fab fa-weibo
Vercel-blog: https://blogver.bere.top || fa-gratipay

在主题配置文件中修改网站页脚信息:

footer:  # 底部信息区
#since: 2021 # 建站时间
icon:
name: fa fa-heart # 图标名称
animated: true # 图标开启动画
color: "#ff0000" # 图标颜色
copyright:
powered: true # 是否显示由 Hexo 强力驱动 true为显示

修改文章信息-meta

默认主题下, 文章标题下方会显示文章的创建时间、文章的修改时间、文章分类信息等元数据,用户可以在主题配置文件中自定义设置需要显示的 meta 元信息:

post_meta:
item_text: true # 显示文字说明
created_at: true # 显示文章创建时间
updated_at:
enable: false # 隐藏文章修改时间
another_day: true # 只有当修改时间和创建时间不是同一天的时候才显示
categories: true # 隐藏分类信息

文章目录信息

在主题配置中修改:

toc:
enable: true # 是否开启文章目录
number: true # 自动将列表编号添加到toc。
wrap: false # 如果为真,如果标题宽度大于侧边栏宽度,则所有单词都将放置在下一行。
expand_all: false # 如果为真,将显示帖子中所有级别的TOC,而不是其激活部分。
max_depth: 6 # 生成toc的最大纵向深度。

添加打赏功能

启用主题配置文件中的打赏相关字段,并将个人收款码图片置于themes\next\source\images\目录下,注意保持图片命名与配置文件中一致:

#捐赠(赞助商)设置,奖励设置:
reward_settings:
enable: true #如果为真,默认情况下,每篇文章中都会显示一个捐赠按钮。
animation: false
reward: # 微信 / 支付宝 / 比特币收款二维码图片存放目录
wechatpay: /images/微信.jpg
alipay: /images/支付宝.jpg

代码块选项

修改主题配置文件如下:

codeblock:
theme: # 代码突出显示主题
light: default # 默认
dark: stackoverflow-dark
prism:
light: prism
dark: prism-dark
copy_button:
enable: true # 在代码块上添加复制按钮
style: flat # 可用值:default | flat | mac
fold:
enable: true # 折叠代码块
height: 200 # 200 高开始折叠。

浏览页面显示当前浏览进度

主题配置中搜索scrollpercent,修改如下:

back2top:
enable: true
sidebar: false #返回侧边栏顶部。
scrollpercent: true #滚动b2t按钮中的百分比标签。

修改网站加载前特效

修改主题配置文件:

#页面加载过程中,顶部的进度条。更多信息:https://github.com/CodeByZach/pace
pace:
enable: true
color: blue # 可选颜色:black | blue | green | orange | pink | purple | red | silver | white | yellow
theme: center-atom #可选主题: bounce | barber-shop | center-atom | center-circle

图片实现全屏查看

使用第三方了图片浏览放大功能的fancybox插件 next主题已经集成了这个第三方插件 ,只须更改 主题配置文件将fancybox的值设为true即可。

启用网站与文章的浏览人数统计

在博客的底部显示网站与文章浏览的人数及次数。

# Show Views / Visitors of the website / page with busuanzi.
# For more information: http://ibruce.info/2015/04/04/busuanzi/
busuanzi_count:
enable: true
total_visitors: true
total_visitors_icon: fa fa-user
total_views: true
total_views_icon: fa fa-eye
post_views: true
post_views_icon: far fa-eye

修改文章模板部分

修改文章底部的#号的标签

next8.0以上版本,可以直接在next主题文件下的_config.next.yml中查找 tag_icon然后把后面的 false改为 true

# Use icon instead of the symbol # to indicate the tag at the bottom of the post
tag_icon: true

为啥呢,因为我在next/layout/_macro/post.njk下发现了这段代码
{%- set tag_indicate = '' if theme.tag_icon else '#' %}

修改hexo博客的字体大小 行间距。

修改blog-demo\themes\next\source\css\_variables\base.styl文件内容如下:

// Font size  此为调整字体大小。
$font-size-base = (hexo-config('font.enable') and hexo-config('font.global.size') is a 'unit') ? unit(hexo-config('font.global.size'), em) : 1em;
$font-size-smallest = .75em;
$font-size-smaller = .8125em;
$font-size-small = .875em;
$font-size-medium = 1em;
$font-size-large = 1.0em; //这是新加行 调整字体大小
//$font-size-large = 1.125em;
$font-size-larger = 1.25em;
$font-size-largest = 1.5em;

//这是行距调整
$line-height-base = 1.8; // 原来2
$line-height-code-block = 1.6; // Can't be less than 1.3; 原来1.6

修改链接文字颜色样式

修改文件模板themes\next\source\css\_common\components\post\post-body.styl文件最后添加如下代码:

.post-body p a{
color: #0593d3;
border-bottom: none;
border-bottom: 1px solid #0593d3;
&:hover {
color: #fc6423;
border-bottom: none;
border-bottom: 1px solid #fc6423;
}
}

侧边栏上显示文章列表:

修改文件模板blog-demo\themes\next\layout\_macro\sidebar.njk,在sidebar.njk文件的最后2行({% endmacro %}</aside>)前面添加以下代码:

<!--最近文章-->
{% if theme.recent_posts.enable %}
<div class ="sidebar-inner" style="padding-top:5px; text-align:left;padding-left: 20px; padding-right: 10px; padding-bottom: 5px;">
<div class="links-of-blogroll animated">
{{ partial('_partials/post/post-recent.njk') }}
</div>
</div>
{%- endif %}

</aside>
{% endmacro %}

在主题配置文件里面添加:

# 近期文章配置  
recent_posts:
enable: true
icon: fab fa-markdown
description: 文章列表

blog-demo\themes\next\layout\_partials\post路径下新建文件post-recent.njkpost-recent.njk文件里写上如下代码:

<div class="links-of-blogroll-title" style="padding-bottom: 5px; padding-top: 5px; padding-left: 0px; padding-right: 20px; font-size: 1.6em; argin-right: 5px;">
{%- if theme.recent_posts.icon %}
<i class="{{ theme.recent_posts.icon }}" aria-hidden="true"></i>
{% endif %}
<b style="color:red; font-size: 1em; padding-left: 8px; position: relative; top: -2px;">{{ theme.recent_posts.description }}</b>
</div>

<ul class="links-of-blogroll-list">
<!-- 文章排序规格,-updated 按照文章更新时间倒排 -->
{% set posts = site.posts.sort('-updated').toArray() %}
<!-- 显示20数目的文章 -->
{% for post in posts.slice('0',theme.recent_posts.max_count) %}
<li class="postsSidebarNumb" style="text-indent: -1em;">
<a href="{{ url_for(post.path) }}" title="{{ post.title }}" target="_blank">{{ post.title }}</a>
</li>
{% endfor %}
</ul>

blog-demo\themes\next\source\css\main.styl文件的最后添加以下代码,给显示的最近文章添加计数:

//侧边栏计数伪类
body {
counter-reset: postsSidebarNumbsection;
}
.postsSidebarNumb::before {
counter-increment: postsSidebarNumbsection;
content: counter(postsSidebarNumbsection) ": ";
}

给网站添加本站运行天数

在博客的底部显示本站已安全运行 1248 天 01小时27分35秒
在文件blog-demo\themes\next\layout\_partials\footer.njk的最后一行添加:

<div style="font-size: 0.85rem">
<span id="timeDate">载入天数...</span>
<span id="times">载入时分秒...</span>
<script src="/runtime.js"></script>

blog-demo\source文件夹下新建runtime.js文件。代码如下:

!(function() {
/** 计时起始时间,自行修改 **/
var start = new Date("2021/11/17 15:28:57");

function update() {
var now = new Date();
now.setTime(now.getTime()+250);
days = (now - start) / 1000 / 60 / 60 / 24;
dnum = Math.floor(days);
hours = (now - start) / 1000 / 60 / 60 - (24 * dnum);
hnum = Math.floor(hours);
if(String(hnum).length === 1 ){
hnum = "0" + hnum;
}
minutes = (now - start) / 1000 /60 - (24 * 60 * dnum) - (60 * hnum);
mnum = Math.floor(minutes);
if(String(mnum).length === 1 ){
mnum = "0" + mnum;
}
seconds = (now - start) / 1000 - (24 * 60 * 60 * dnum) - (60 * 60 * hnum) - (60 * mnum);
snum = Math.round(seconds);
if(String(snum).length === 1 ){
snum = "0" + snum;
}
document.getElementById("timeDate").innerHTML = "本站已安全运行&nbsp"+dnum+"&nbsp天";
document.getElementById("times").innerHTML = hnum + "&nbsp小时&nbsp" + mnum + "&nbsp分&nbsp" + snum + "&nbsp秒";
}

update();
setInterval(update, 1000);
})();

博客增加小顶栏(工具栏)

打开文件blog-demo\themes\next\layout\index.njk,在其中指定位置增加如下代码:

{% block class %}index posts-expand{% endblock %}

{% block content %}

<!-- 新增 -->

<ul class="sub-menu menu">
<li class="menu-item menu-item-getting-started animated"><a href="/posts/f687/" rel="section" data-pjax-state=""><i class="fa fa-flag fa-fw"></i>在线工具、资源</a></li>
<li class="menu-item menu-item-theme-settings animated"><a href="/posts/30c3/" rel="section" data-pjax-state=""><i class="fa fa-star fa-fw"></i>网络教程、解决方案</a></li>

<!--
<li class="menu-item menu-item-third-party-services animated"><a href="/docs/third-party-services/" rel="section" data-pjax-state=""><i class="fa fa-puzzle-piece fa-fw"></i>Third Party Services</a></li>
<li class="menu-item menu-item-tag-plugins animated"><a href="/docs/tag-plugins/" rel="section" data-pjax-state=""><i class="fa fa-rocket fa-fw"></i>Tag Plugins</a></li>
<li class="menu-item menu-item-advanced-settings animated"><a href="/docs/advanced-settings/" rel="section" data-pjax-state=""><i class="fa fa-cog fa-fw"></i>Advanced Settings</a></li>
<li class="menu-item menu-item-troubleshooting animated"><a href="/docs/troubleshooting.html" rel="section" data-pjax-state=""><i class="fa fa-life-ring fa-fw"></i>Troubleshooting</a></li>
-->
</ul>

<!-- 新增结束 -->

{%- for post in page.posts.toArray() %}
{{ partial('_macro/post.njk', {post: post, is_index: true}) }}
{%- endfor %}

/posts/f687//posts/30c3/是存放的post文章。其他页面同理。

为友情链接单独开个页面

hexo new page links添加一个友情页,会在blog-demo\source\links下生成一个index.md文件,打开输入以下内容。

---
title: 友情链接
type: “links”

---

<style>
.links-container {
display: grid;
grid-template-columns: repeat(auto-fill, minmax(250px, 1fr));
gap: 20px;
margin-top: 40px;
}

.link-item {
background-color: #fff;
border-radius: 8px;
box-shadow: 0 4px 8px rgba(0, 0, 0, 0.1);
transition: transform 0.3s ease, box-shadow 0.3s ease;
}

.link-item:hover {
transform: translateY(-5px);
box-shadow: 0 8px 16px rgba(0, 0, 0, 0.2);
}

.link-card {
display: flex;
flex-direction: column;
justify-content: center;
align-items: center;
padding: 20px;
text-decoration: none;
color: #333;
border-radius: 8px;
}

.link-card:hover {
background-color: #f5f5f5;
}

.link-icon img {
width: 80px;
height: 80px;
margin-bottom: 15px;
border-radius: 50%;
object-fit: cover;
}

.link-info h3 {
font-size: 18px;
font-weight: bold;
margin-bottom: 5px;
}

.link-info p {
font-size: 14px;
color: #666;
text-align: center;
line-height: 1.5;
}

/* 增加响应式设计 */
@media (max-width: 768px) {
.links-container {
grid-template-columns: 1fr;
}
}
</style>

<div class="links-content">
<div class="link-navigation">
<div class="card">
<img class="ava" src="https://zxblog.eu.org/avatar.webp" />
<div class="card-header">
<div>
<a href=" https://zxblog.eu.org">知行博客's Blog</a>
</div>
<div class="info">Java资源速查</div>
</div>
</div>
<div class="card">
<img class="ava" src="https://blog.bere.top/logo.svg" />
<div class="card-header">
<div>
<a href="https://blog.bere.top">浩跃霖希's Blog</a>
</div>
<div class="info">努力学习的小菜鸟</div>
</div>
</div>
</div>
</div>

hexo插件安装

Local Search本地搜索

此插件用于生成搜索索引文件,其中包含文章的所有必要数据,您可以使用这些数据为您的博客编写本地搜索引擎。支持 XMLJSON 格式输出。安装插件hexo-generator-searchdb,执行以下命令:
npm install hexo-generator-searchdb然后在站点配置文件最后添加如下代码:

search:
path: search.xml # 生成的搜索文件路径
field: post # 您要搜索的搜索范围,您可以选择: post ,page,all
content: true # 是否包含每篇文章的全部内容。
format: html # 页面内容显示的形式,选项有: html,striptags,raw
limit: 10000

编辑 主题配置文件,启用本地搜索功能:

#本地搜索,依赖关系:https://github.com/next-theme/hexo-generator-searchdb
local_search:
enable: true
top_n_per_article: 1 # 显示每篇文章的前n个结果,通过设置为-1显示所有结果
unescape: false # 将html字符串拆分为可读字符串。
preload: false # 加载页面时预加载搜索数据。

安装侧边栏相关文章列表插件

hexo-related-posts是 Hexo 静态站点生成器的插件,使用 TF/IDF 算法生成相关文章列表。
npm i --save hexo-related-posts

Administrator@DESKTOP-O7B3NJL MINGW64 /d/hexo-next8.23/blog-demo 执行结果
$ npm i --save hexo-related-posts

added 77 packages in 29s
54 packages are looking for funding
run `npm fund` for details

然后在主题配置中启用:

# Related popular posts相关热门文章 没有安装包
# Dependencies: https://github.com/sergeyzwezdin/hexo-related-posts
related_posts:
enable: true
icon: fa fa-signs-post

隐藏文章插件

Github地址:https://github.com/printempw/hexo-hide-posts,在站点根目录下执行`npm install hexo-hide-posts –save`,在站点目录下的_config.yml中如下配置:

# hexo-hide-posts
hide_posts:
enable: true # 是否启用
# 标记隐藏帖子的关键字。#如果你愿意,可以更改为任意名字。
filter: hidden
# 为隐藏的文章添加 noindex meta 标签,阻止搜索引擎收录
noindex: true
# allowlist中的生成器将可以访问隐藏的帖子。Hexo中常见的生成器:“索引”、“标签”、“类别”、“存档”、“站点地图”、“提要”
# allowlist_generators: []
# 阻止列表中的生成器无法访问隐藏的帖子。#如果同时设置了分配列表和阻止列表,则分配列表的优先级高于阻止列表。
# blocklist_generators: ['*']

在文章的属性中定义 hidden: true 即可隐藏文章。
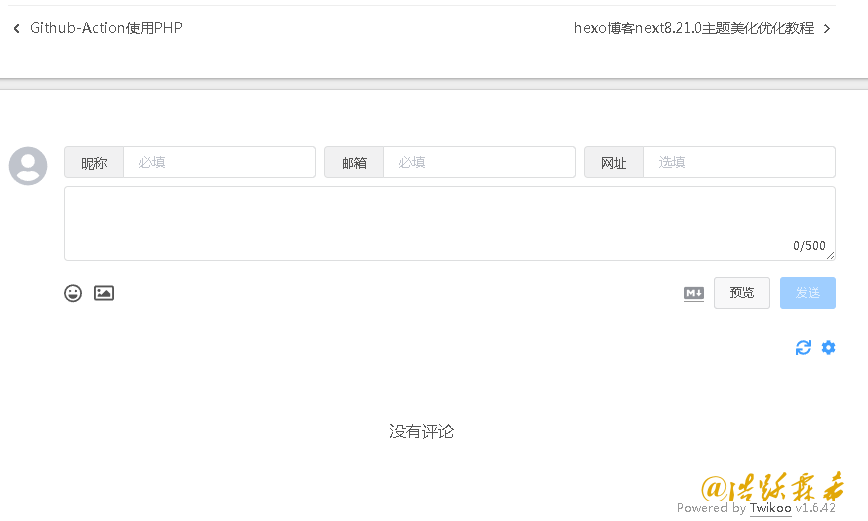
---
title: 'Hidden Post'
date: '2021/03/05 21:45:14'
hidden: true
---

在 安装twikoo评论插件

twikoo评论插件说明

暂不支持 NexT 8 以下的版本,请先升级到 NexT 8。然后在 Hexo 项目根目录执行

# For NexT version >= 8.0.0 && < 8.4.0      #8.08.4的版本用下面这个
npm install hexo-next-twikoo@1.0.0
# For NexT version >= 8.4.0 # 8.4以上的版本用这个
npm install hexo-next-twikoo@1.0.3
Administrator@DESKTOP-O7B3NJL MINGW64 /d/hexo-next8.23/blog-demo    执行结果
$ npm install hexo-next-twikoo@1.0.3

added 9 packages in 5s
41 packages are looking for funding
run `npm fund` for details

然后在主题配置文件修改配置:

comments:
style: tabs
active: twikoo
storage: true
lazyload: false
nav:

twikoo:
enable: true
visitor: true
envId: https://noo.netlify.app/.netlify/functions/twikoo # 腾讯云环境填 envId;Vercel 环境填地址(https://xxx.vercel.app)
# region: ap-guangzhou # 环境地域,默认为 ap-shanghai,腾讯云环境填 ap-shanghai 或 ap-guangzhou;Vercel 环境不填

image-20250418111732295

字数统计和阅读时长插件

主题 配置文件中已经有了hexo-word-counter这个插件的配置,但是没有安装插件包,插件包地址,所有只在主题配置中设置还是不行的。

npm i -- save hexo-word-counter
Administrator@DESKTOP-O7B3NJL MINGW64 /d/hexo-next8.23/blog-demo 代码执行结果
$ npm i -- save hexo-word-counter

added 14 packages in 11s
42 packages are looking for funding
run `npm fund` for details

然后在主题配置文件中启用:

# Post wordcount display settings   Hexo 文章的字数统计和阅读时长 没有安装包
# Dependencies: https://github.com/next-theme/hexo-word-counter
symbols_count_time:
separated_meta: true
item_text_total: true

文章加密插件

首先, hexo-blog-encrypt这是 Hexo 生态圈中 最好的 博客加密插件。在线演示, 所有的密码都是 hello。安装命令npm install --save hexo-blog-encrypt,安装完成之后,把将 “password” 字段添加到您文章信息头就像这样。

---
title: Hello World
date: 2016-03-30 21:18:02
password: hello
---
  • 高级设置 具体设置请查看这里
    ---
    title: Hello World
    tags:
    - 作为日记加密
    date: 2016-03-30 21:12:21
    password: mikemessi
    abstract: 有东西被加密了, 请输入密码查看.
    message: 您好, 这里需要密码.
    wrong_pass_message: 抱歉, 这个密码看着不太对, 请再试试.
    wrong_hash_message: 抱歉, 这个文章不能被校验, 不过您还是能看看解密后的内容.
    ---

flowchart 流程图插件

hexo默认不支持流程图,flowchart简便易食,可以瞬间使hexo流程图无中生有。

npm install --save hexo-filter-flowchart
  • 语法结构:X=>Y: Z。其中,X是变量名, Y是指操作模块名,冒号后面的Z是具体显示的文字内容。需要注意的是,冒号后要加空格才能识别,而X,Y与=>之间不允许有空格。

  • 节点Y的固定内容。start=》开始,end=》结束,operation=》普通操作块,subroutine=》子任务块,condition=》判断块,intputoutput=》输入输出块。

  • 连接方向。连接线有上下左右四个方向,如果需要指定连接线连接到某一特定方向,在连接线开始的元素后面添加方向即可,方向包括:(top),(bottom),(left),(right)。

  • 如果要设置条件框连接线方向,在括号中添加即可。条件框只有两个方向可供选择:yes向下,no向右(默认),yes向右,no向下。cond(yes,right),cond(no,bottom)。

  • 在hexo站点配置文件中修改

    highlight:   # 代码块的设置, 请参考 Highlight.js 进行设置
    exclude_languages: # 美人鱼流程图
    - mermaid
    line_number: false
    auto_detect: false
    tab_replace: ''
    wrap: true
    hljs: false
  • 在主题 配置文件中开启美人鱼流程图设置, Hexo 配置文件也要设置

    # Mermaid tag
    mermaid:
    enable: true
    # Available themes: default | dark | forest | neutral
    theme:
    light: default
    dark: dark

    百度站点地图插件

    npm install hexo-generator-baidu-sitemap --save

    Administrator@DESKTOP-O7B3NJL MINGW64 /d/hexo-next8.23/blog-demo
    $ npm install hexo-generator-baidu-sitemap --save
    npm warn deprecated lodash.pick@4.4.0: This package is deprecated. Use destructu
    ring assignment syntax instead.
    npm warn deprecated rimraf@2.4.5: Rimraf versions prior to v4 are no longer supp
    orted
    npm warn deprecated source-map-url@0.4.1: See https://github.com/lydell/source-m
    ap-url#deprecated
    npm warn deprecated urix@0.1.0: Please see https://github.com/lydell/urix#deprec
    ated
    npm warn deprecated glob@6.0.4: Glob versions prior to v9 are no longer supporte
    d
    npm warn deprecated source-map-resolve@0.5.3: See https://github.com/lydell/sour
    ce-map-resolve#deprecated
    npm warn deprecated resolve-url@0.2.1: https://github.com/lydell/resolve-url#dep
    recated
    npm warn deprecated hexo-bunyan@1.0.0: Please see https://github.com/hexojs/hexo
    -bunyan/issues/17
    npm warn deprecated cuid@1.3.8: Cuid and other k-sortable and non-cryptographic
    ids (Ulid, ObjectId, KSUID, all UUIDs) are all insecure. Use @paralleldrive/cuid
    2 instead.
    npm warn deprecated swig-templates@2.0.3: unmaintained
    npm warn deprecated highlight.js@9.18.5: Support has ended for 9.x series. Upgra
    de to @latest
    npm warn deprecated core-js@1.2.7: core-js@<3.23.3 is no longer maintained and n
    ot recommended for usage due to the number of issues. Because of the V8 engine w
    hims, feature detection in old core-js versions could cause a slowdown up to 100
    x even if nothing is polyfilled. Some versions have web compatibility issues. Pl
    ease, upgrade your dependencies to the actual version of core-js.

    added 235 packages in 17s
    56 packages are looking for funding
    run `npm fund` for details

    安装完成后,每次进行打包的时候,会自动在public文件夹下生成``sitemap.xmlbaidusitemap.xml`分别用于Google和百度。

    将页面提交到服务器后,通过域名/sitemap.xml或者域名/baidusitemap.xml可以进行访问sitemap。

    Google 版本 npm install hexo-generator-sitemap --save

    参考:https://zhuanlan.zhihu.com/p/150999914

    站点配置文件中添加以下代码:

    baidusitemap:
    path: baidusitemap.xml

    设置百度主动推送

    安装``hexo-baidu-url-submit`插件。

    npm install hexo-baidu-url-submit --save

    Administrator@DESKTOP-O7B3NJL MINGW64 /d/hexo-next8.23/blog-demo  执行结果
    $ npm install hexo-baidu-url-submit --save

    added 2 packages in 3s
    56 packages are looking for funding
    run `npm fund` for details

    在站点配置文件中添加baidu-url-submit的配置项

    baidu_url_submit:
    count: 1000 ## 提交最新的1000个链接
    host: https://blog.bere.top/ ## 在百度站长平台中注册的域名
    token: rNAJGHTNfQltcUPa #请注意这是您的秘钥, 所以请不要把博客源代码发布在公众仓库里!
    path: baidu_urls.txt ## 文本文档的地址, 新链接会保存在此文本文档里

    安装hexo-seo-submit

    hexo7.3.0和next主题8.23现在只能安装hexo-seo-submit@0.11.0-@0.15.0的版本,

    如果版本太高会出现错误:

    ERROR Plugin load failed: hexo-seo-submit

    安装hexo-seo-submit@0.15.0

    npm i --save [email protected]

    Administrator@DESKTOP-O7B3NJL MINGW64 /d/hexo-next8.23/blog-demo 执行结果
    $ npm i --save hexo-seo-submit@0.15.0

    added 19 packages in 3s
    58 packages are looking for funding
    run `npm fund` for details

    然后在站点配置文件中添加以下代码:

    # 生成站点地图,被搜索  这个没用上 没有适用的版本
    hexo-seo-submit:
    sortBy: updated # created | updated, default created
    count: 2 # set all engine count, default 10
    fileRootPath: hexo-seo-submit # will generate in root/public/fileRootPath, default '', root/public/
    CI:
    enable: true
    cron: 0 4 * * *
    platform: github # github | coding, default gitHub
    branch: main # actions trigger branch, default master

    baidu:
    enable: true # default false
    path: baidu.txt # default google.txt
    count: 1
    token: rNAJGasdfwcUPa
    google:
    enable: true
    path: google-url.txt # default google.txt
    # find path in root
    accountKeysJSonFile: google.json # path.join(process.cwd(), path)
    count: 2
    # maybe required
    proxy: http://127.0.0.1:7890
    bing:
    enable: true
    apiKey: da53b5f392234d0ab22
    sortBy: created # default created
    path: bing.json

Markdown 和 Visual Studio Code

Markdown 编写教程

一次完整的Hexo写作流程

博客文章加密:

微信公众号引流插件:https://docs.techgrow.cn/v1/wechat/tutorial/hexo/